


A couple of posts ago, I did a bow using an antique brad and satin ribbon. Several people asked how it was done, so I took a few pictures, which my granddaughter found highly amusing :)
("Whatcha doin', Gramcy? Huh?? Whatcha doin'?)
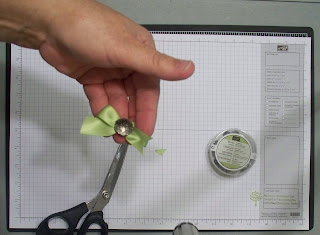
Anyway - here's what I used - 108360 - Craft scissors; 117273 - Antique brads; 117288 - Certainly Celery 5/8 satin ribbon; 116631 - Paper piercer
1. Cut a piece of 5/8 inch ribbon about 7 inches long, fold in half and give it a little finger crease to mark the mid point.


2. Use the piercer to open up the brad's legs.


 4. Cross the other tail over, creating the bow shape.
5. Pick up the brad and rest the ribbon, top side of bow towards the brad head, back side of bow facing up so you can close the legs over it.
 6. Gently fold the legs over the back side of bow.
 6. Gently fold the legs over the back side of bow.

7. Fold each tail end of bow lengthwise and cut from fold out to raw end, creating the notched shape.


Et voila! Finished bow - adhere with sticky strip or glue dots!


Go now - make a bow or two!!!


No comments:
Post a Comment